
- Empty cart.
- Continue Shopping

- Home /
- Page
Different Propogation Methods of Plants
Different propogation
methods of Plants
Cultivation of Plants
Cultivation of plants, also known as farming or gardening, is the intentional and systematic process of growing various types of plants for human use, such as food, medicine, ornamental purposes, or industrial materials. This essential practice has been a fundamental aspect of human civilization for thousands of years, playing a crucial role in providing sustenance and improving the quality of life.

Watch the YouTube video to learn the characteristics of each plant
There are various production methods for plants, each designed to meet specific needs and objectives. These methods can be broadly categorized into traditional and modern approaches. Here's a description of some of the different production methods:
Field Production:
Field production is the traditional method of growing plants outdoors in open fields. This approach is suitable for large-scale cultivation of crops like grains, vegetables, and fruits. It relies on natural sunlight, rainfall, and soil fertility. Farmers prepare the land, sow seeds or transplant seedlings, and manage the crops throughout their growth cycle.
Greenhouse Production:
Greenhouse production involves cultivating plants in controlled environments within enclosed structures made of glass or plastic. This method allows farmers to manipulate factors such as temperature, humidity, light, and ventilation, providing an extended growing season and protection from adverse weather conditions. It is commonly used for growing delicate or high-value crops, such as flowers, herbs, and certain vegetables.
Hydroponics:
Hydroponics is a modern soilless cultivation method where plants are grown in nutrient-rich water solutions without using traditional soil. Instead, plant roots are directly exposed to the nutrient solution, and support may be provided through inert materials like rock wool or perlite. This method maximizes resource efficiency, requires less water compared to field production, and allows for greater control over nutrient uptake and plant growth.
Aeroponics:
Aeroponics is a variation of hydroponics in which plant roots are suspended in air, and nutrients are delivered as a fine mist or aerosol. This method promotes highly efficient nutrient absorption and minimizes water usage, making it suitable for limited-space or vertical farming applications.
Vertical Farming:
Vertical farming is a modern approach that involves growing plants in stacked layers or vertically inclined surfaces. It makes use of artificial lighting, hydroponics, or aeroponics to optimize space and resource utilization. Vertical farms are often located in urban areas, reducing the need for long-distance transportation of produce and providing fresh produce to local communities.
Tissue Culture:
Tissue culture, also known as micropropagation, is a laboratory-based method of plant production. It involves growing plant tissues or cells in a controlled nutrient medium under sterile conditions. This method allows for the rapid production of genetically identical plant clones, making it valuable for mass propagation of specific plant varieties, disease-free plants, and rare species conservation.
Intensive Farming:
Intensive farming is a production method that maximizes yield per unit area by employing advanced agricultural technologies, high inputs of fertilizers and pesticides, and precise irrigation systems. This approach is commonly used for high-demand crops, like staple foods, and aims to increase overall productivity.
Each of these production methods has its advantages and disadvantages, and their suitability depends on factors such as the type of crop, available resources, environmental conditions, and economic considerations. Agricultural practices continue to evolve, and farmers often combine multiple methods to achieve optimal results.
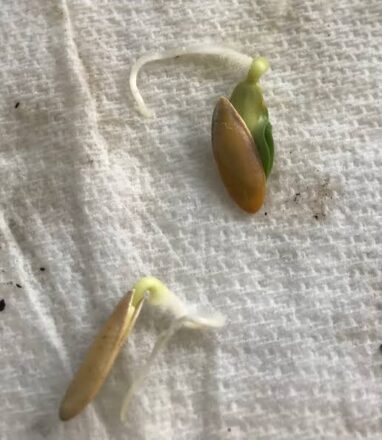

How to germinate
seedlings
Germinating seedlings is an important step in starting a garden or growing plants from seeds. Here’s a general guide on how to germinate seedlings:

Choose the right seeds
Select high-quality seeds from a reputable source. Make sure the seeds are fresh and suited for the growing conditions in your area.
Prepare your containers
Use clean containers with drainage holes at the bottom. You can use seed trays, peat pots, or recycled containers. Ensure they are sterilized to prevent the growth of pathogens.
Prepare the growing medium
Use a seed-starting mix or a combination of peat moss, vermiculite, and perlite. Moisten the mix with water until it is damp but not waterlogged.
Sow the seeds
Follow the recommended sowing depth for the specific plant species you are growing. Generally, small seeds are sown shallowly, while larger seeds are sown deeper. Space the seeds according to the plant's spacing requirements.
Provide proper temperature and humidity
Most seeds germinate best at specific temperatures, usually mentioned on the seed packet. Maintain a consistent temperature in the range specified. You can use a seedling heat mat to provide bottom heat if necessary. Covering the containers with a plastic dome or plastic wrap helps retain moisture and create a humid environment.
Watering
Keep the growing medium consistently moist but not waterlogged. Avoid overwatering, as it can lead to damping off and root rot. Use a spray bottle or a fine mist nozzle to water gently, preventing disturbance to the seeds
Provide adequate light
Once the seeds have germinated and sprouted, they need ample light to grow healthy. Place the seedlings in a location with bright, indirect light or use grow lights if natural light is insufficient. Adjust the light source's height to keep it a few inches above the seedlings.
Thin the seedlings
If multiple seedlings emerge in a single container, thin them out by removing the weaker ones, allowing the strongest seedling to grow unimpeded.
Transplanting
As the seedlings grow and develop a few sets of true leaves, they will outgrow their initial containers. Transplant them into larger pots or into the garden, following the specific recommendations for each plant species.
Provide ongoing care
Continue to water the seedlings as needed, ensuring they receive adequate moisture. Fertilize them with a diluted, balanced fertilizer once they have a few sets of true leaves. Gradually acclimate the seedlings to outdoor conditions before transplanting them into the garden.
How to germinate Plant From Cutting
Germinating plant cuttings is a common method of propagating many plants. Here's a general guide on how to germinate plant cuttings:
Select a healthy cutting
.Choose a stem or leaf cutting from a healthy, mature plant. The cutting should be free from any diseases, pests, or damage. Use clean, sharp pruning shears or a knife to make a clean cut just below a node (the point where a leaf or bud emerges from the stem).
Prepare the cutting
Remove any lower leaves or flowers from the bottom part of the cutting, leaving a few leaves at the top. This helps reduce water loss and focuses the plant's energy on root development. If the cutting is large, you can also cut the remaining leaves in half to reduce moisture loss further.
Rooting hormone (optional)
Applying rooting hormone to the cut end of the plant cutting can help stimulate root growth and increase the chances of successful germination. Follow the instructions on the rooting hormone package for proper application.
Choose a rooting medium
The rooting medium should be well-draining and suitable for promoting root growth. Common options include vermiculite, perlite, peat moss, or a mix of these. Fill a clean container with the rooting medium and moisten it slightly. Insert the cutting: Make a hole in the rooting medium using a pencil or your finger. Insert the cut end of the cutting into the hole, ensuring that at least one node is submerged in the rooting medium. Gently firm the medium around the cutting to hold it in place.
Insert the cutting
: Make a hole in the rooting medium using a pencil or your finger. Insert the cut end of the cutting into the hole, ensuring that at least one node is submerged in the rooting medium. Gently firm the medium around the cutting to hold it in place.
Insert the cutting
Make a hole in the rooting medium using a pencil or your finger. Insert the cut end of the cutting into the hole, ensuring that at least one node is submerged in the rooting medium. Gently firm the medium around the cutting to hold it in place.
Provide proper conditions:
Place the container with the cutting in a warm, bright location with indirect light. Avoid direct sunlight, as it can scorch the cutting. Maintain a consistent temperature and humidity level, as these vary depending on the plant species.
Mist and water
Keep the rooting medium slightly moist but not waterlogged. Mist the cutting and the surrounding air regularly to maintain humidity levels. Be cautious not to overwater, as excess moisture can lead to rotting.
Transplanting
Once the cutting has developed a healthy root system, it can be transplanted into a pot with well-draining soil. Continue caring for the plant as you would for a mature specimen of that species.
Provide ongoing care
Continue to water the seedlings as needed, ensuring they receive adequate moisture. Fertilize them with a diluted, balanced fertilizer once they have a few sets of true leaves. Gradually acclimate the seedlings to outdoor conditions before transplanting them into the garden.
It's important to note that while this general guide applies to many plants, specific plants may have unique requirements for successful cutting germination. It's advisable to research the specific plant species you are working with to ensure you provide the optimal conditions for germination.
Method of Plant Air Layering
Plant air layering is a propagation technique used to create new plants by encouraging roots to form on a stem while it is still attached to the parent plant. This method allows for the development of a well-rooted plant that can be separated and grown independently. Here's a step-by-step guide for plant air layering:
Select a Healthy Branch
Choose a healthy, non-flowering branch on the parent plant that is about pencil-thickness or slightly thicker. Ideally, select a branch that is flexible and easy to work with.
Prepare the Branch
Make a small upward cut on the selected branch, about 1/3 of the way through the branch diameter. The cut should be about 2 inches (5 cm) long. Make a second cut below the first one, removing a ring of bark and exposing the inner wood.
Apply Rooting Hormone
Apply a powdered or liquid rooting hormone to the exposed area of the branch. This will help stimulate root growth.
Wrap with Moist Moss or Medium
Take a handful of moist sphagnum moss or a suitable rooting medium and wrap it around the exposed area of the branch. Make sure the moss covers the entire area, extending a few inches above and below the cut.
Secure the Moss
Wrap plastic wrap or a sheet of clear plastic tightly around the moss to keep it in place. Ensure that the plastic is sealed on both ends to create a mini greenhouse environment.
Monitor and Maintain
Check the moss periodically to ensure it remains moist throughout the air layering process. Mist the moss with water if it starts to dry out. Avoid overwatering or saturating the moss excessively.
Root Formation
Over time, roots will begin to develop within the moss. This process can take several weeks to a few months, depending on the plant species and environmental conditions.
Check Root Development
After a sufficient amount of time, carefully unwrap the plastic and gently peel away the moss. Check for well-formed roots. If roots have developed, the air layer is ready for separation from the parent plant.
Separate and Pot
Using clean and sharp pruning shears or a knife, cut the air layer just below the root zone. Prepare a suitable pot with well-draining soil or potting mix. Plant the air-layered section into the pot, ensuring the roots are covered with soil.
Provide Care
Place the newly potted plant in a location with appropriate light and temperature conditions for its specific species. Water the plant as needed, allowing the soil to dry out slightly between waterings. Provide proper care and monitor the plant's progress as it establishes itself.
Plant air layering is a reliable method of propagation that can be used on various plant species. It allows for the creation of new plants that are genetically identical to the parent plant and ensures a higher success rate compared to other propagation techniques.
Method of Plant Grafting
Plant grafting is a common technique used to join two different plant parts, called the scion and the rootstock, to create a new plant with desirable traits. Grafting allows for the combination of specific characteristics, such as disease resistance or improved fruit quality, onto a sturdy root system. Here's a step-by-step guide for plant grafting:
Select Scion and Rootstock
Choose a healthy scion, which is the desired plant variety or cultivar you want to propagate, and a suitable rootstock, which provides a strong root system and compatible growth habits. Ensure that the scion and rootstock are of similar sizes in diameter for successful grafting.
Prepare Scion and Rootstock
Make a sloping cut near the base of the scion, about 2-3 inches (5-7.5 cm) long, with a clean and sharp grafting knife. The cut should have a 45-degree angle and expose the cambium layer, the greenish layer just below the bark. Similarly, prepare the rootstock by making a straight and clean cut.
Match the Cuts
Place the sloping cut of the scion against the straight cut of the rootstock, ensuring that their cambium layers align as closely as possible. The cambium layers need to be in contact for successful graft union and nutrient transport.
Secure the Graft
Use grafting tape or grafting clips to tightly bind the scion and rootstock together. Start below the graft union and wrap upwards, overlapping the tape or securing the clips firmly. Make sure the union is secure but not overly tight to avoid damaging the plant tissues.
Protect the Graft
Apply grafting compound or grafting wax to seal the graft union and protect it from drying out or infection. This helps create a favorable environment for healing and reduces the risk of pathogen entry.
Provide Support
Depending on the size and stability of the graft, you may need to use support materials, such as stakes or splints, to keep the grafted plant in an upright position. This prevents movement or accidental breakage during the healing process.
Maintain Proper Conditions:
Place the grafted plant in a controlled environment, such as a greenhouse or a sheltered area, with suitable temperature and humidity levels to promote graft union. Provide adequate light and protect the graft from direct sunlight until it has healed.
Monitor and Prune
Regularly check the graft union for signs of healing, such as new growth or callus formation. Remove any side shoots or buds that emerge below the graft union to ensure all the plant's energy is directed towards graft healing and growth.
Gradual Removal of Support
Once the graft union has successfully formed and the plant has established itself, gradually remove the supporting materials. This allows the grafted plant to develop its strength and stability.
Provide Care
Place the newly potted plant in a location with appropriate light and temperature conditions for its specific species. Water the plant as needed, allowing the soil to dry out slightly between waterings. Provide proper care and monitor the plant's progress as it establishes itself.
Plant grafting requires practice and precision, so it's advisable to learn from experienced grafters or consult horticultural resources for specific techniques and considerations for different plant species. With proper technique and care, grafting can be a successful method for propagating plants with desired traits and characteristics.
Method of Plant Buding
Plant budding, also known as bud grafting, is a method of plant propagation that involves attaching a bud from a desired plant variety onto a rootstock. This technique allows for the transfer of specific traits and characteristics of the desired plant onto a robust root system. Here's a step-by-step guide for plant budding:
Select the Rootstock
Choose a healthy and compatible rootstock, which will provide the root system for the grafted plant. Ensure that the rootstock and desired plant variety are compatible in terms of species or closely related varieties.
Timing
Budding is typically performed during the active growing season when the bark easily slips away from the wood. This is usually in late spring or summer, depending on the specific plant species and climate.
Prepare the Rootstock
On the rootstock, make a vertical T-shaped incision in the bark with a sharp and sterile budding knife. The vertical cut should be about 1 inch (2.5 cm) long, with a horizontal cut across the top of the vertical cut, forming a "T" shape.
Collect the Bud
Select a bud from the desired plant variety, preferably from the current season's growth. The bud should be plump and healthy, with well-developed leaf primordia. Remove the bud by making a horizontal cut below the bud, ensuring a small portion of the bark is included.
Insert the Bud
Gently lift the bark of the rootstock near the vertical incision and insert the bud under the lifted bark, making sure the bud shield (the rounded part on the back of the bud) is in direct contact with the cambium layer of the rootstock.
Secure the Bud
Use budding rubbers or budding tape to firmly bind the bud onto the rootstock. Begin below the bud union and wrap upwards, overlapping the tape while ensuring a tight but not overly constrictive fit. This helps provide support and maintains contact between the bud and rootstock.
Protect the Bud
Apply grafting compound or grafting wax to seal the bud union, preventing drying out and protecting against infection. This creates a favorable environment for healing and reduces the risk of pathogen entry.
Remove the Bud Shield
After a few weeks, once the bud has successfully taken and the bud union has formed, gently remove the protective wrapping and cut off the top portion of the bud shield, leaving only a small stub above the bud.
Monitor and Prune
Regularly monitor the bud for signs of growth, such as the development of leaves or shoots. Remove any competing growth below the bud union to direct the plant's energy towards the bud and promote its growth
Gradual Removal of Support
Once the bud has established and is actively growing, gradually remove any supporting materials, such as tape or rubbers, to allow the bud to grow independently.
Plant budding requires practice and precision, so it's advisable to learn from experienced grafters or consult horticultural resources for specific techniques and considerations related to different plant species. With proper technique and care, budding can be a successful method for propagating plants and transferring desired characteristics.
Propagating Plants Using Suckers
Certainly! If you're interested in propagating plants using suckers, here's a step-by-step method you can follow:
Materials Needed:
1. Pruning shears or sharp garden knife
2. Rooting hormone (optional)
3. Pots or containers
4. Potting mix
5. Watering can
Select Healthy Suckers:
Choose healthy suckers that are well-formed and free from diseases or pests. Suckers that are a few inches to several inches in length are ideal.
Timing:
Perform the sucker propagation during the plant's active growing season, typically in spring or early summ
Prepare the Suckers:
Using pruning shears or a sharp garden knife, carefully cut the sucker from the parent plant. Ensure that each sucker has a portion of the stem and, if possible, a few leaves attached.
Trimming:
Trim the bottom of the sucker at a 45-degree angle just below a node (the point where leaves or buds are attached). This angle provides a larger surface area for root development.
Optional: Apply Rooting Hormone:
If you have rooting hormone available, you can dip the cut end of the sucker into the rooting hormone. This helps stimulate root development.ently lift the bark of the rootstock near
Prepare Containers:
Fill small pots or containers with a well-draining potting mix. Moisten the mix before planting the suckers.
Planting:
Insert the cut end of each sucker into the prepared potting mix, burying it to a depth that covers at least one or two nodes. Firm the soil around the sucker.
Watering:
Water the newly planted suckers thoroughly. Ensure that the soil is consistently moist but not waterlogged.
Provide Ideal Conditions:
Place the pots in a location with bright, indirect light. Avoid direct sunlight, especially during the initial stages of root development.
Monitor and Care:
Keep the soil consistently moist, and monitor the suckers for signs of growth. Once they have established roots and show new growth, they can be gradually acclimated to outdoor conditions.
Transplanting:
Once the suckers have developed a strong root system and have grown sufficiently, they can be transplanted into larger containers or directly into the garden.
Maintenance:
Continue to care for the newly propagated plants by providing appropriate water, sunlight, and nutrients.
Remember that not all plants produce suckers, and the success of propagation can vary depending on the plant species. Additionally, some plants may be more successfully propagated using other methods, such as cuttings or seeds.
Mandevilla Propagation
Mandevilla can be propagated through several methods, including stem cuttings and seeds. Here are the steps for each propagation method:
Stem Cuttings
Select a Healthy Plant
Choose a healthy Mandevilla plant for taking cuttings. Ensure it's free from pests and diseases.
Choose the Right Time
The best time to take stem cuttings is in the spring or early summer when the plant is actively growing.
Prepare the Cutting
Cut a 6 to 8-inch (15 to 20 cm) section of a healthy stem just below a leaf node. Use a clean, sharp knife or pruning shears.
Remove Leaves
Remove the leaves from the lower half of the cutting, leaving a few leaves at the top.
Rooting Hormone (Optional)
Dip the cut end of the stem into rooting hormone, which can help stimulate root growth.
Planting
Plant the cutting in a well-draining potting mix. Water the soil thoroughly.
Provide Humidity
Cover the cutting with a plastic bag or a plastic dome to create a humid environment. This encourages root development
Place in Indirect Light
Put the potted cutting in a location with bright, indirect light. Avoid direct sunlight, as it can be too intense for newly rooted cuttings
Monitor and Transplant
Keep the soil consistently moist but not waterlogged. Once the cutting has established roots, which may take several weeks, transplant it into a larger container or into the garden.
Seeds
Harvest Seeds
Collect seeds from the seed pods that develop on the Mandevilla plant after the flowers have faded.
Seed Treatment (Optional)
Some gardeners scarify Mandevilla seeds by lightly scratching or nicking the seed coat to enhance germination. Soaking the seeds in warm water for a few hours can also be beneficial.
Sowing
Sow the seeds in a seed-starting mix, pressing them lightly into the surface of the soil. Do not cover the seeds with soil.
Provide Warmth
Keep the soil consistently warm, ideally around 70-75°F (21-24°C), for germination
Maintain Moisture
Keep the soil consistently moist but not waterlogged
Transplanting
Once the seedlings have developed several sets of true leaves and are large enough to handle, transplant them into individual pots or directly into the garden.
Regardless of the method you choose, it's important to provide proper care for the newly propagated Mandevilla, including appropriate watering, light, and gradually acclimating the plants to outdoor conditions if they were started indoors.
Black-Eyed Susan Vine (Thunbergia alata) propagation
Black-Eyed Susan Vine (Thunbergia alata) can be propagated through several methods, including seeds and cuttings. Here's how you can propagate this attractive vine:
Propagation from Seeds
Collecting Seeds
Harvest seeds from mature Black-Eyed Susan Vine flowers. Allow the flowers to mature, and the seed pods will form.
Seed Preparation
.Open the seed pods and collect the seeds. Allow them to air-dry for a day or two.
Sowing Seeds Indoors
Start seeds indoors about 6-8 weeks before the last expected frost date in your area
Planting Seeds
Plant the seeds in a well-draining seed-starting mix, covering them lightly with soil
Germination
Keep the soil consistently moist, and provide warmth for germination. Germination usually takes 7-14 days.
Transplanting
Once the seedlings have developed a few sets of true leaves, transplant them into individual pots
Outdoor Planting
.Transplant the seedlings outdoors after the last frost when the soil has warmed up.
Propagation from Cuttings
Selecting Cuttings
Take 4 to 6-inch (10 to 15 cm) cuttings from healthy, disease-free Black-Eyed Susan Vine plants. Cut just below a leaf node
Removing Leaves
Remove the leaves from the lower half of the cutting.
Rooting Hormone (Optional)
Optionally, dip the cut end in rooting hormone to encourage root development.
Planting Cuttings
Plant the cuttings in a well-draining rooting medium, such as a mix of perlite and peat
Maintaining Humidity
Keep the cuttings in a warm and humid environment. You can cover them with a plastic bag or place them in a propagato
Rooting Time
Roots should develop in a few weeks. Once roots are established, transplant the cuttings into individual pots
Outdoor Planting
Transplant the rooted cuttings outdoors after the last frost
General Tips
- Propagation is often more successful during the growing season. - Maintain high humidity for cuttings until roots develop. - Provide a support structure for the young plants to climb as they grow
Remember that success rates for propagation can vary, and it's a good idea to experiment with multiple methods to find the one that works best for your specific conditions. Always use healthy plant material, and follow proper hygiene practices to minimize the risk of diseases during the propagation process

Home
.Visit to know our various services

Shop
Visit to purchase various products

Planting & Care
Answers to your doubts about plants